How to Hike to the Albert 1er Glacier in Chamonix
The hike to the Albert Iᵉʳ Glacier and the nearby refuge is one of the many dramatic trails in the Chamonix area. It wasn’t originally on our list, but a local recommended it, and I’m really glad we took their advice. It’s a bit farther from Chamonix proper than many hikes, but worth the extra effort.
The glacier is rugged and beautiful, surrounded by some of the starkest peaks in the area, which creates a truly unmatched vista. Read on to get all the details on how to experience this incredible spot.
Note: The glacier and refuge are named after King Albert I of Belgium, an avid mountaineer. In French, you’ll see this written as Albert Premier or Albert Iᵉʳ (or Ier).
How to Get to the Trail
Transportation
Driving: The most convenient way to get to the trailhead is by car. The hike starts in Le Tour, about 7 miles northeast of central Chamonix, and there’s a large parking lot near the Charamillon gondola station. Driving is definitely the simplest option, so if you have a car, I’d recommend it.
Bus: Public transportation is also possible, but it takes a bit more planning. You can take a bus from Chamonix that drops you right at the gondola station. The N3 and 02 are the most common routes, though several others work as well.
Train: There’s also a TER train from Chamonix to Le Tour, but the station is nearly a mile from the gondola. The road between them is steep, so if you take the train, be prepared for a solid uphill walk or plan to hop on a bus for the final stretch.
Trail Starting Points
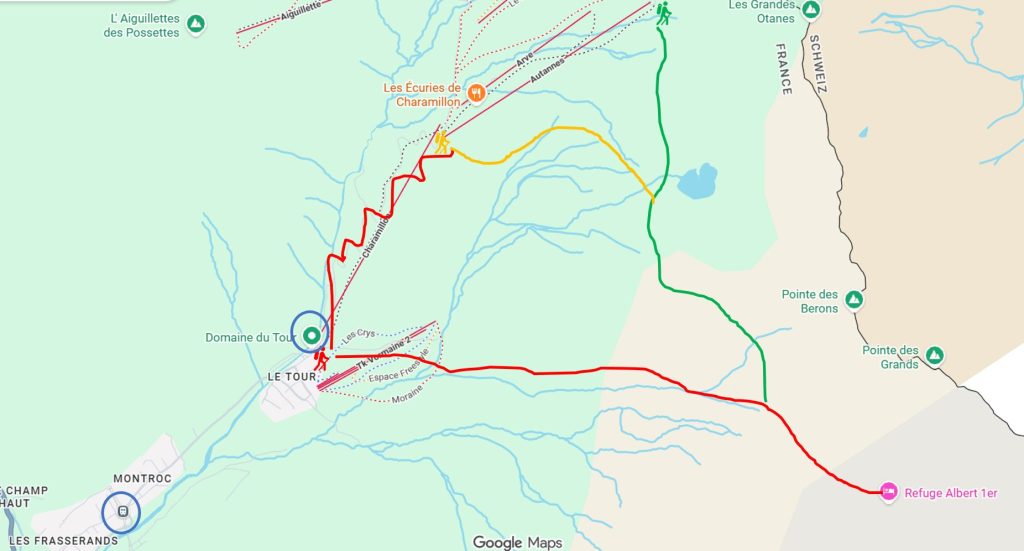
Green hiker – The lift system is split into two sections. Many hikers take the Charamillon gondola from the valley to the mid-station, and then switch to the Autannes chairlift to reach the upper starting point. That is what we did and what this guide will focus on.
Yellow hiker – It is also possible to start hiking from the mid-station instead of taking the second lift. This adds about a half mile of walking, but it also adds a significant amount of elevation gain, so keep that in mind when planning your day.
Red hiker – Finally, you can begin your hike from the Charamillon station in the valley. There are two trails that start here. One leads directly up the mountain to the refuge, but it is very, very steep. It seems it is mostly used for descent as it shortens the distance.
The other option follows a trail underneath the gondola line (the squiggly red line drawn in on the map). This will almost double your total hiking distance, and of course give you significant extra elevation. But if you don’t have a gondola pass, don’t want to buy a ticket, or just want a more strenuous hike, there is that option.
In general, though, I would recommend getting the Chamonix Multipass when visiting the area. Check out this guide for all the details about the pass.
What The Hike Is Like
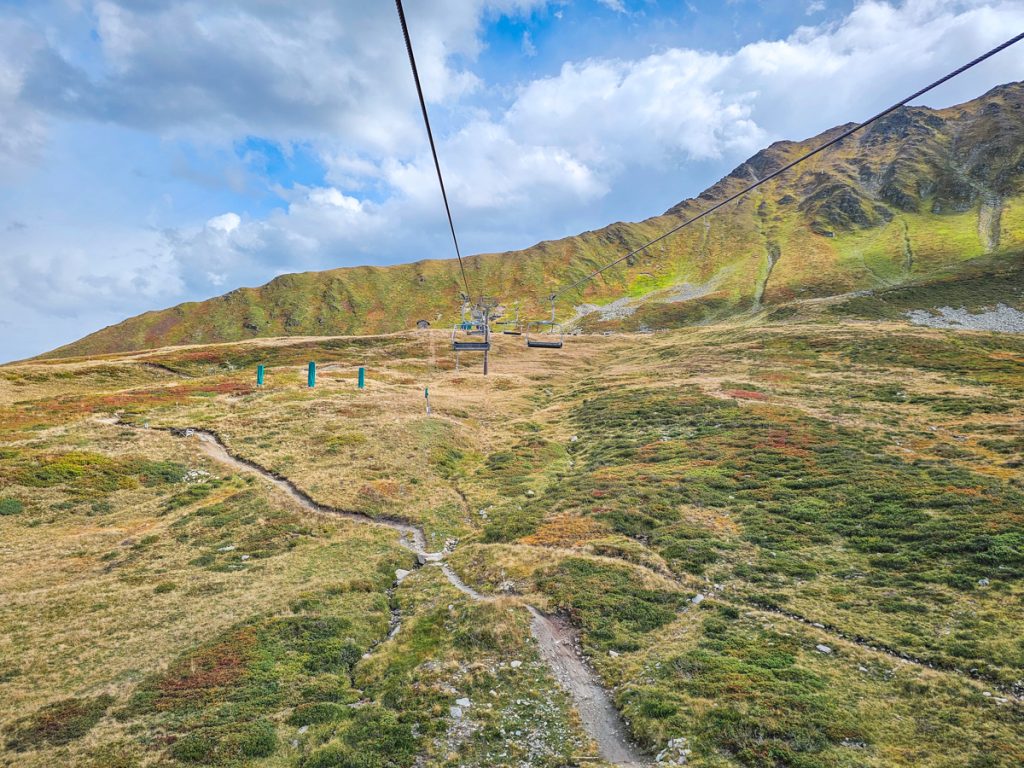
We took both the Charamillon gondola and the Autannes chairlift up into the mountains, starting at the green hiker icon on the map above. As soon as you get off the lift, the scenery looking back down through the valley is excellent.
Maps of the Trail Sections
Section 1
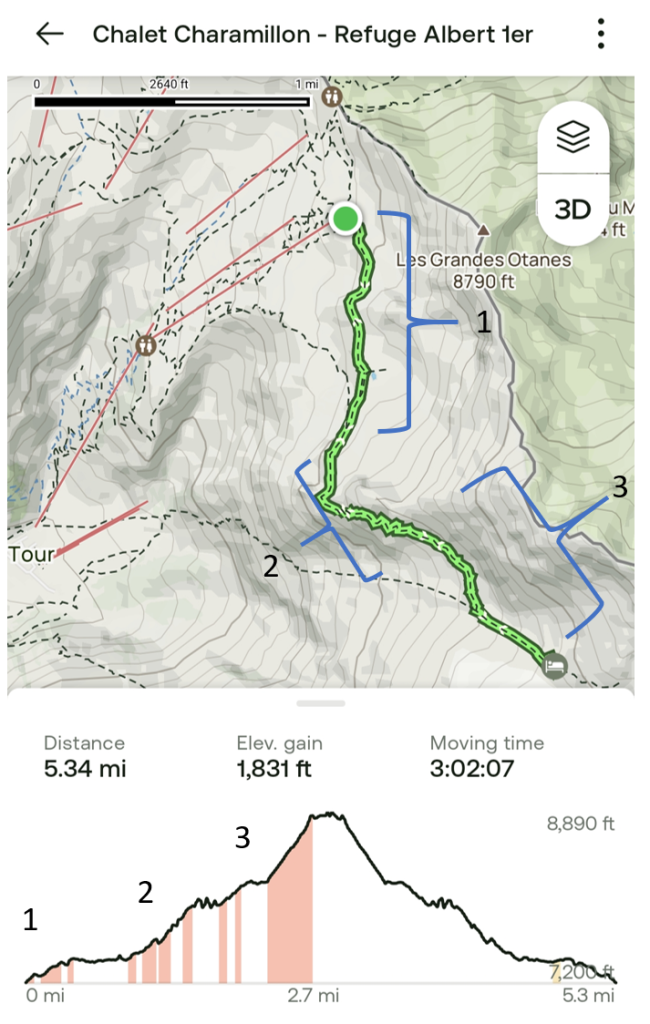
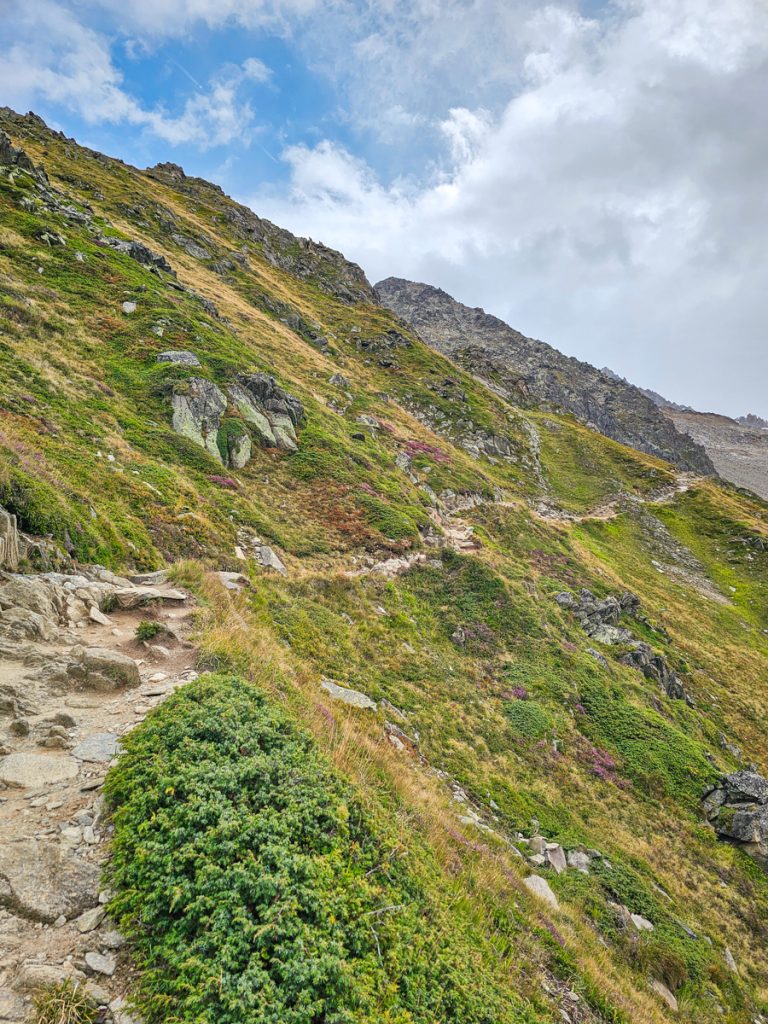
The trail starts out on a well-marked dirt and stone path along the mountainside. This first section is about 1.3 miles long with roughly 300 feet of elevation gain, and felt like a pretty gentle incline and easy trail.
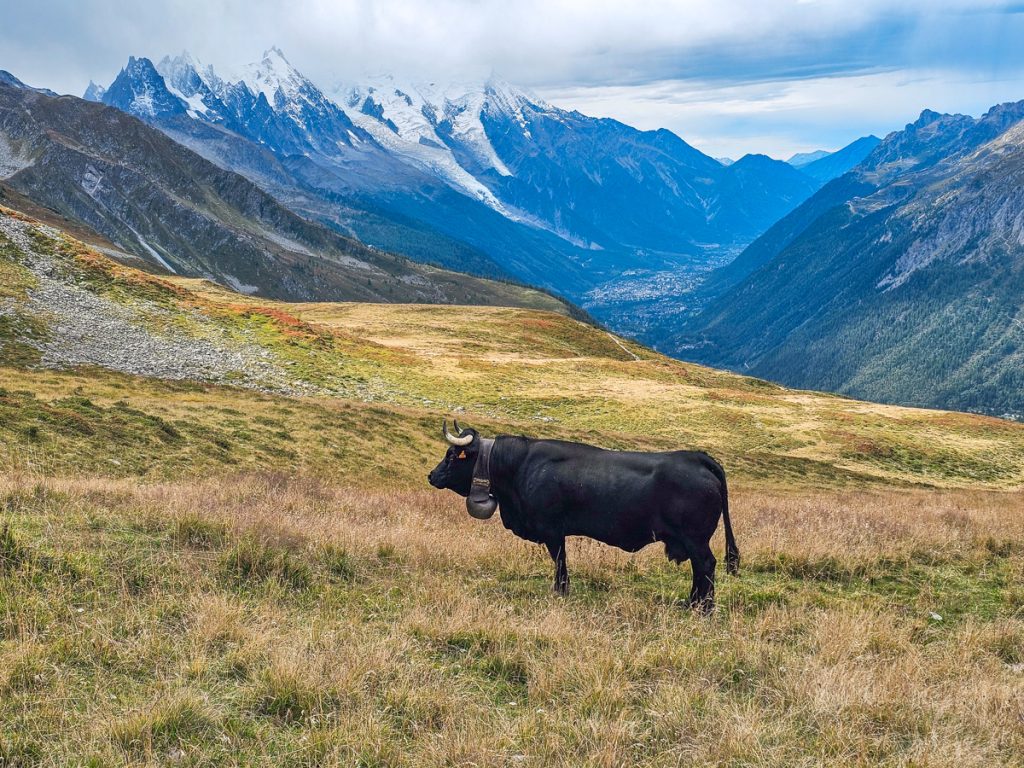
Along the way, you’ll have views up to the cliffs above, whose ridgelines form the border with Switzerland, as well as nice views down into the valley below. The landscape feels very classic alpine, with open slopes and low vegetation.
Expect to see cows grazing along parts of the trail, with cowbells echoing through the valley. In late summer and early fall, when we hiked, you could also spot wild blueberries growing along the path. The small bursts of blue paired with the reddening leaves are really pretty.

This section ends at the junction with the trail that heads down toward the chairlift transition, marked as the yellow trail on the map above.
Section 2
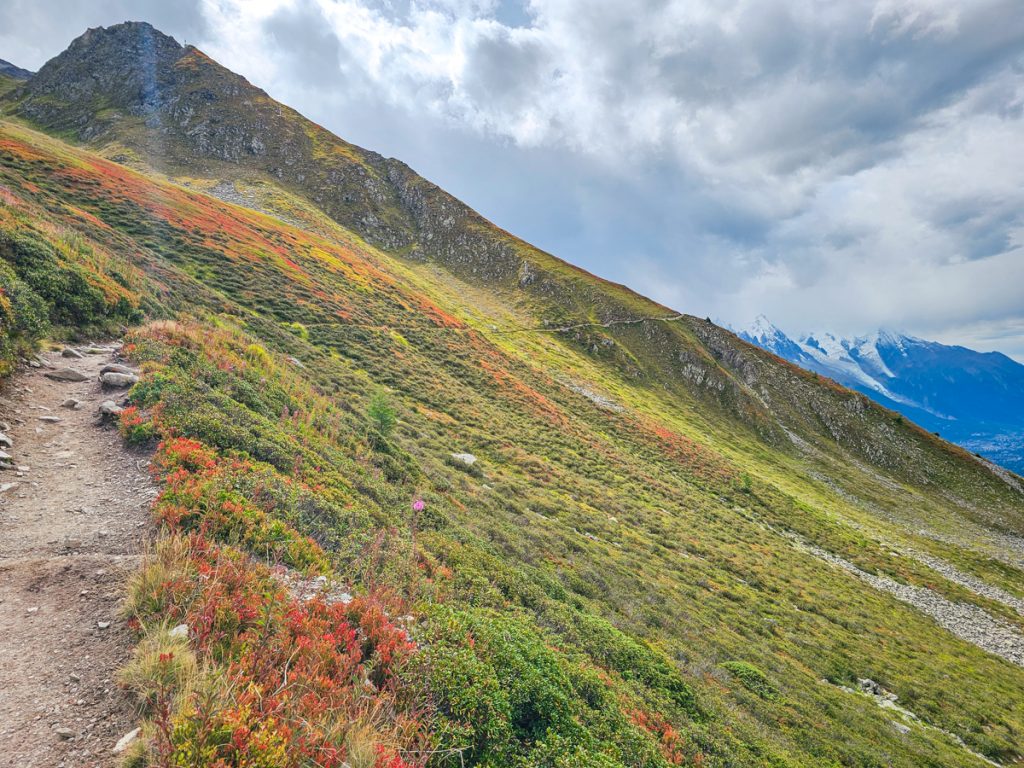
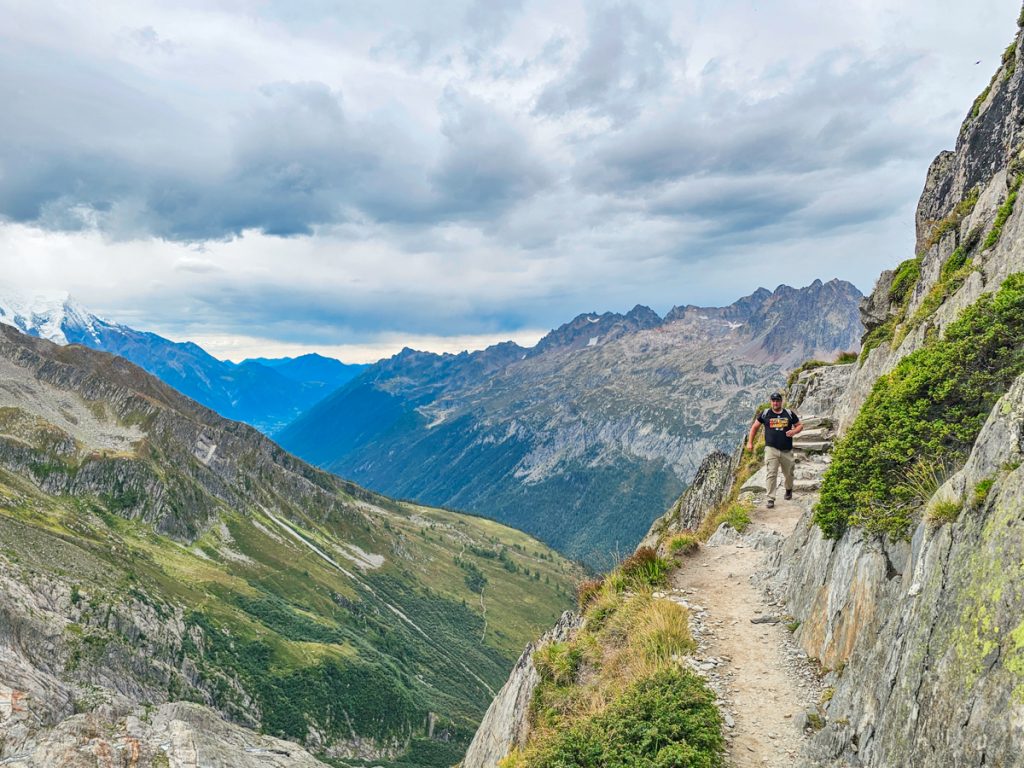
Not long after the yellow trail junction, the terrain becomes much more dramatic. After turning a sharp corner, the trail steepens, and you’ll walk along exposed cliffs, with railings in a few spots for support, as you begin the climb toward the refuge and glacier.
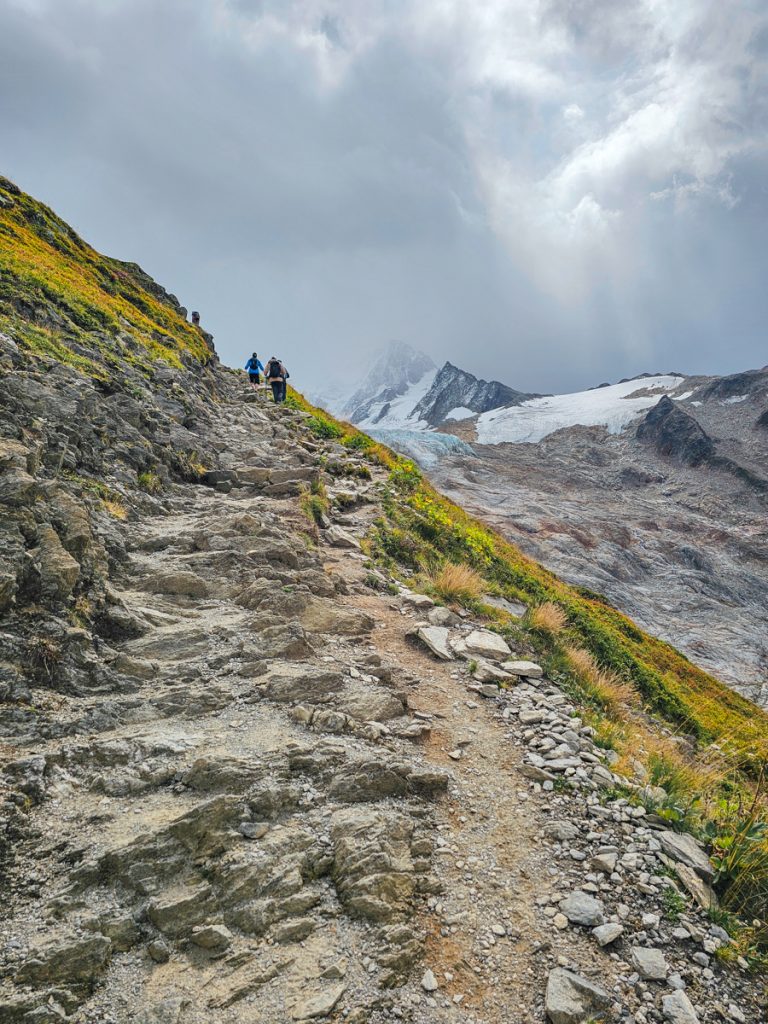
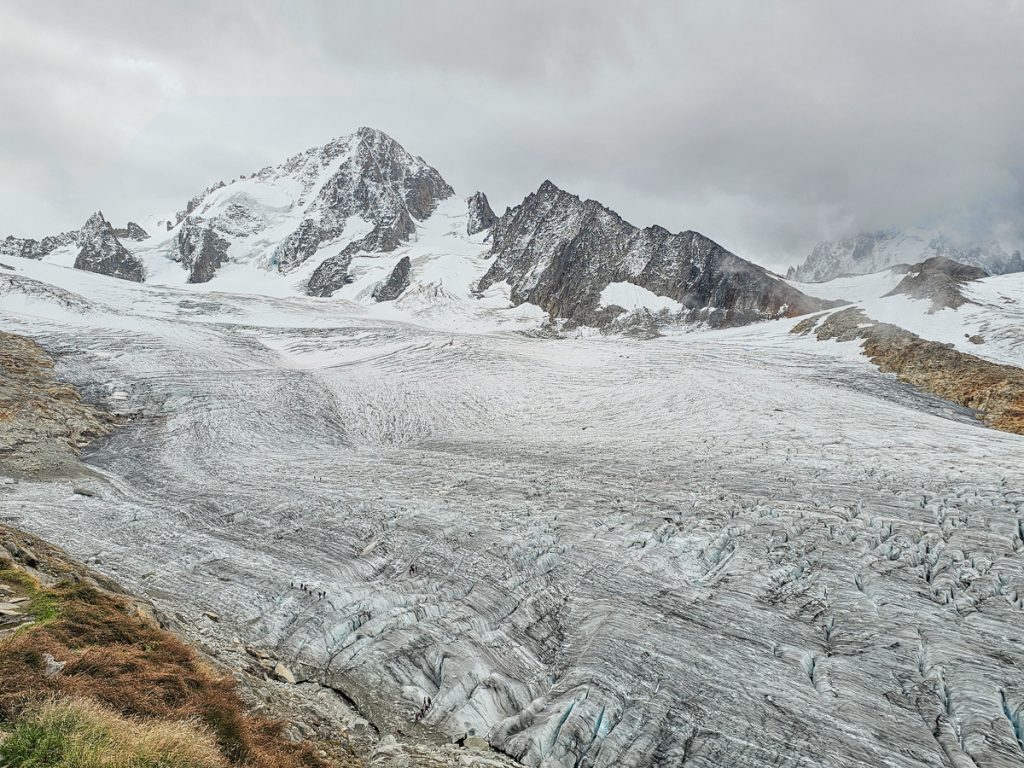
From here, you’ll start to see the glacier ahead, along with a nice waterfall fed by its outflow. The view of the glacier is really beautiful and the landscape feels very wild and rugged.
The push up the refuge is long and steady, with sustained uphill the whole way. From this point, you can expect about 1,300 feet of elevation gain over roughly 1.4 miles.
Section 3
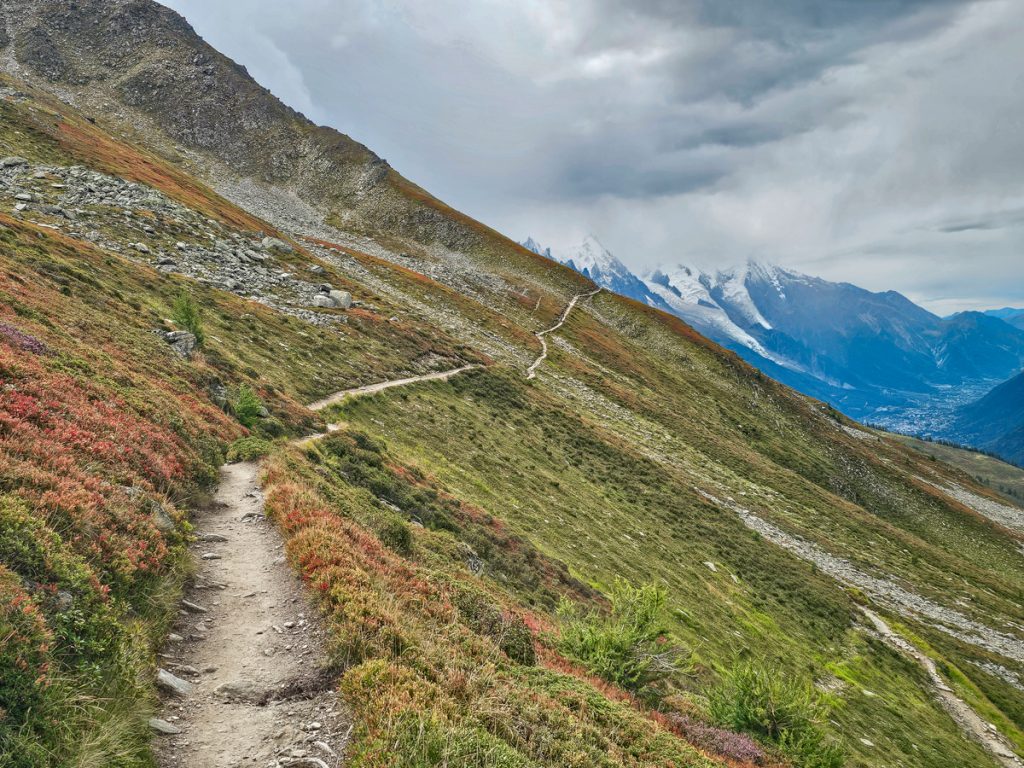
This may be the most beautiful section of the hike. You’re very close to the glacier just to the side, and the peaks above are absolutely beautiful.
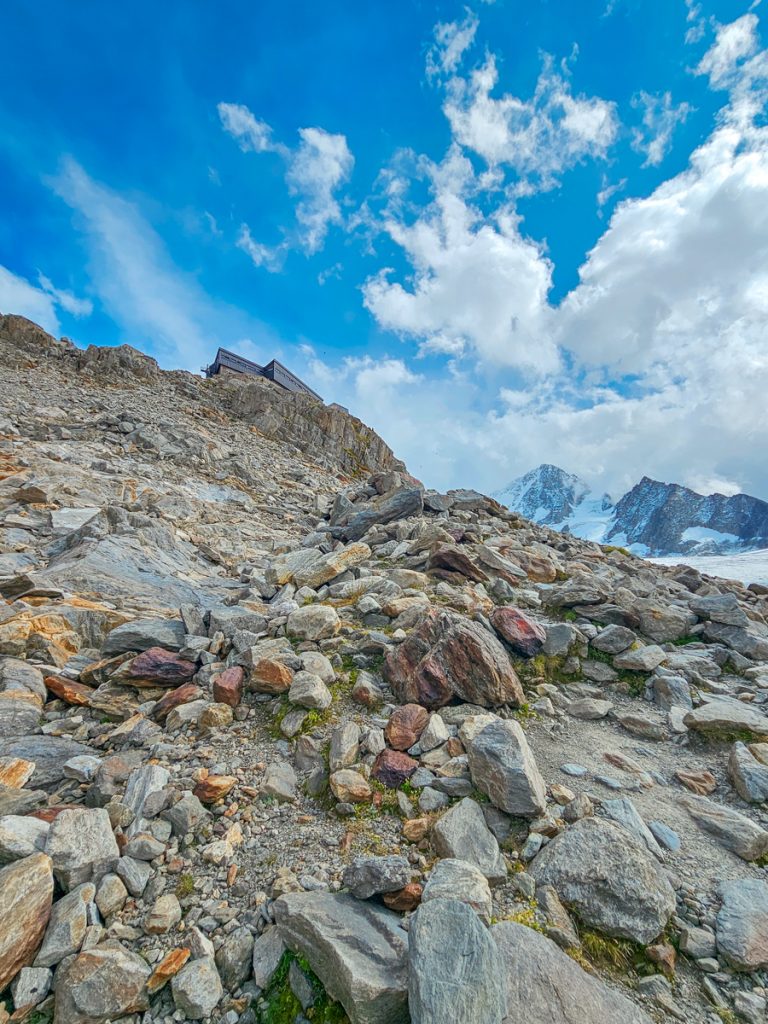
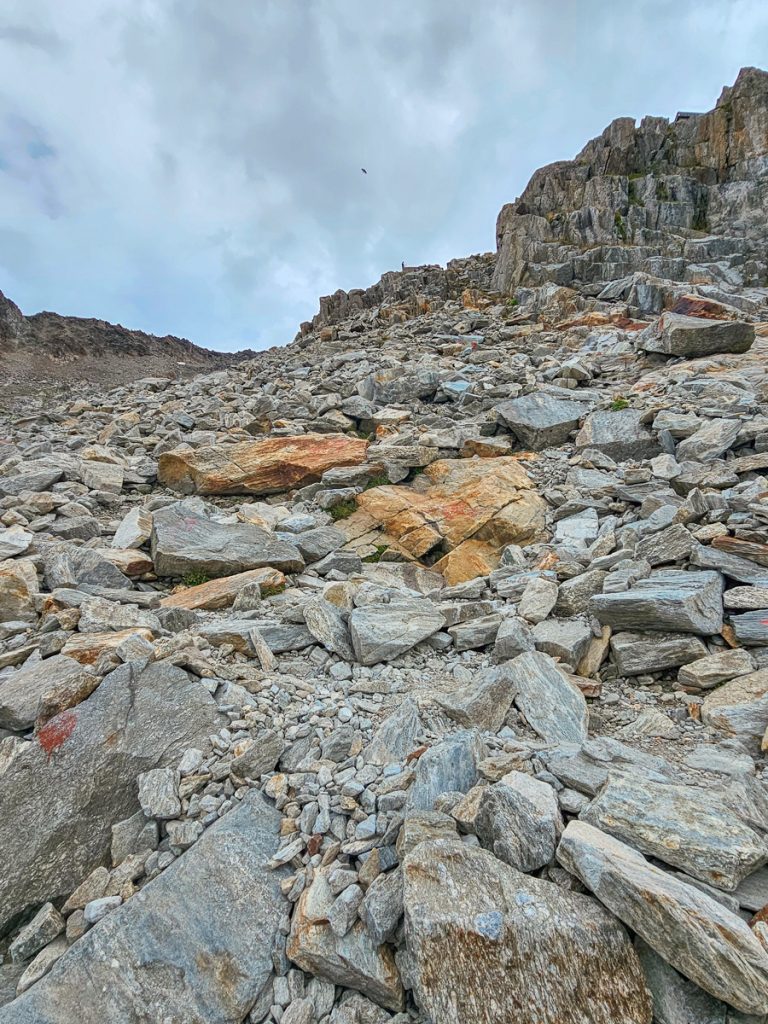
On the other hand, it is also quite challenging, because you can see Refuge Albert 1er right above you and it seems close. However, the path is very steep and rocky, and it still takes a surprising amount of effort and time to reach it.
The final stretch climbs through a very steep rock pile. You’ll need to pick your way around and over large rocks as you make your way up to the refuge.
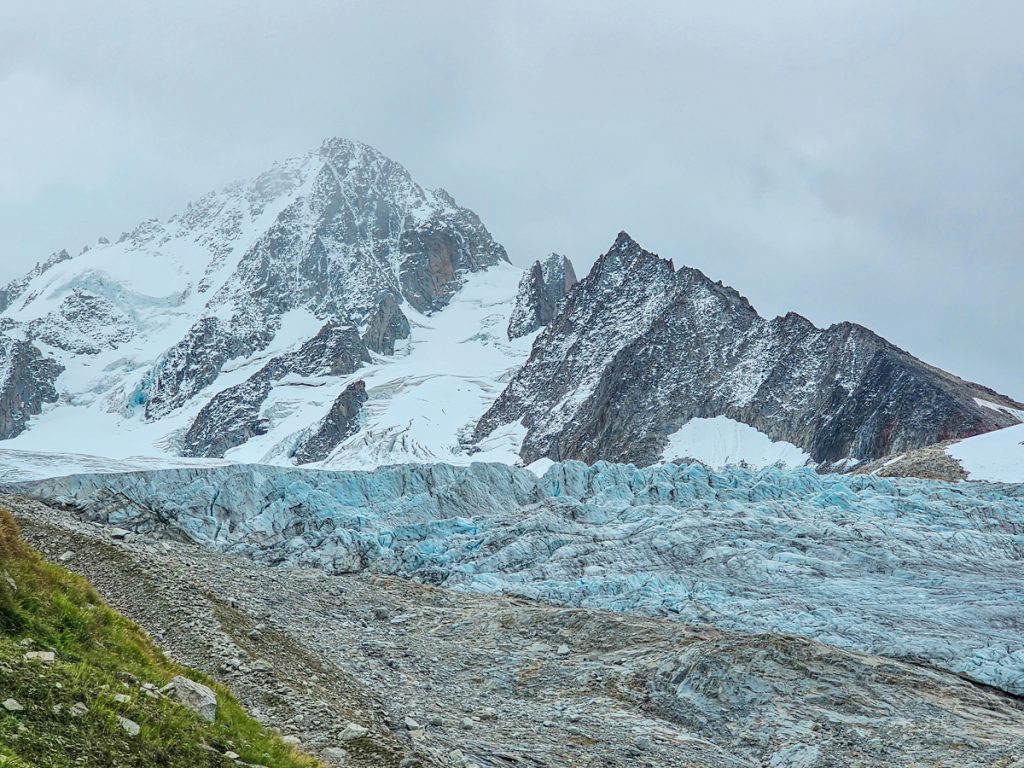
The Albert 1er Glacier and Refuge
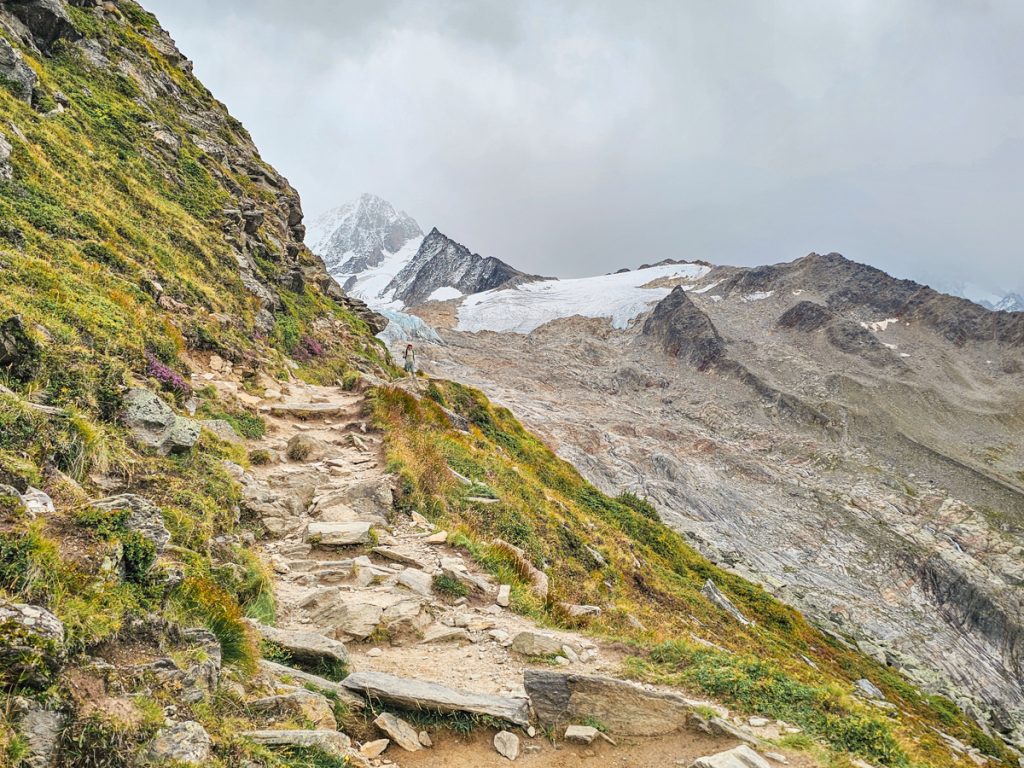
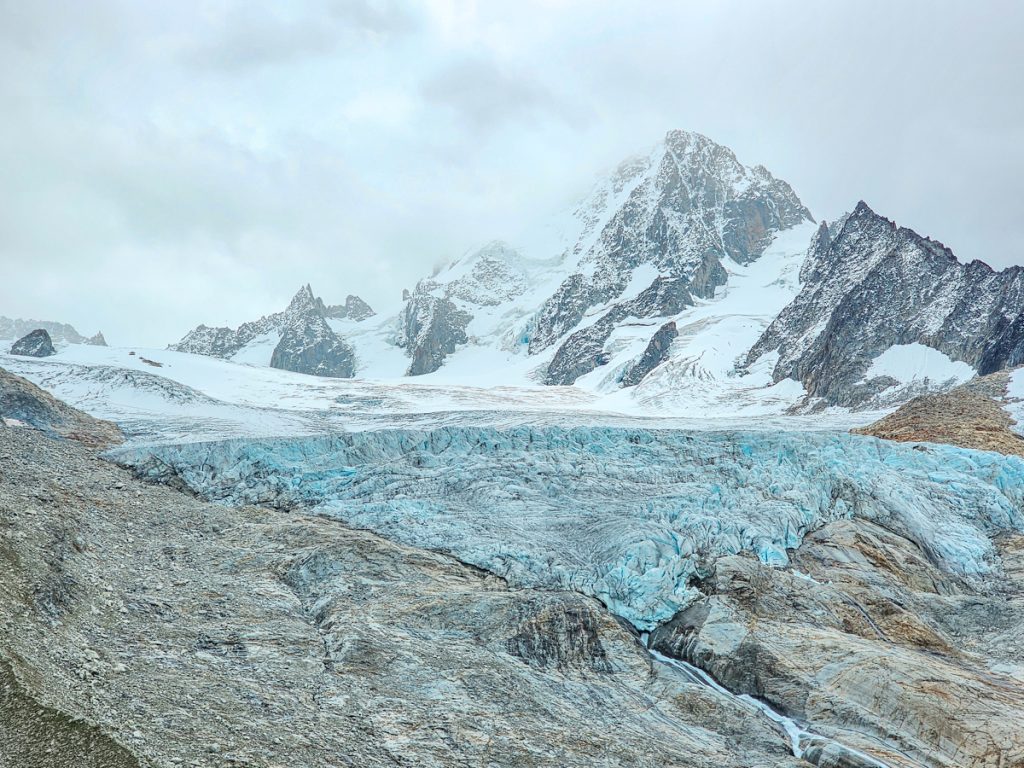
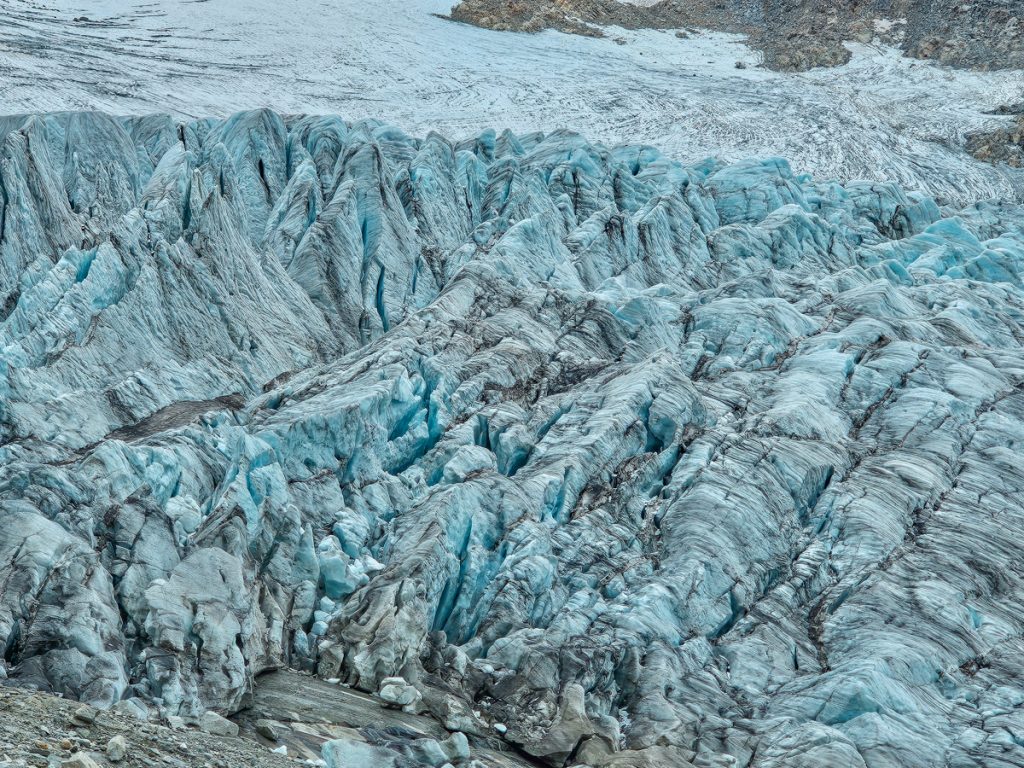
The payoff at the top is absolutely worth the effort to get there. The Albert 1er glacier is incredible and starkly beautiful, with jagged formations and deep crevasses.
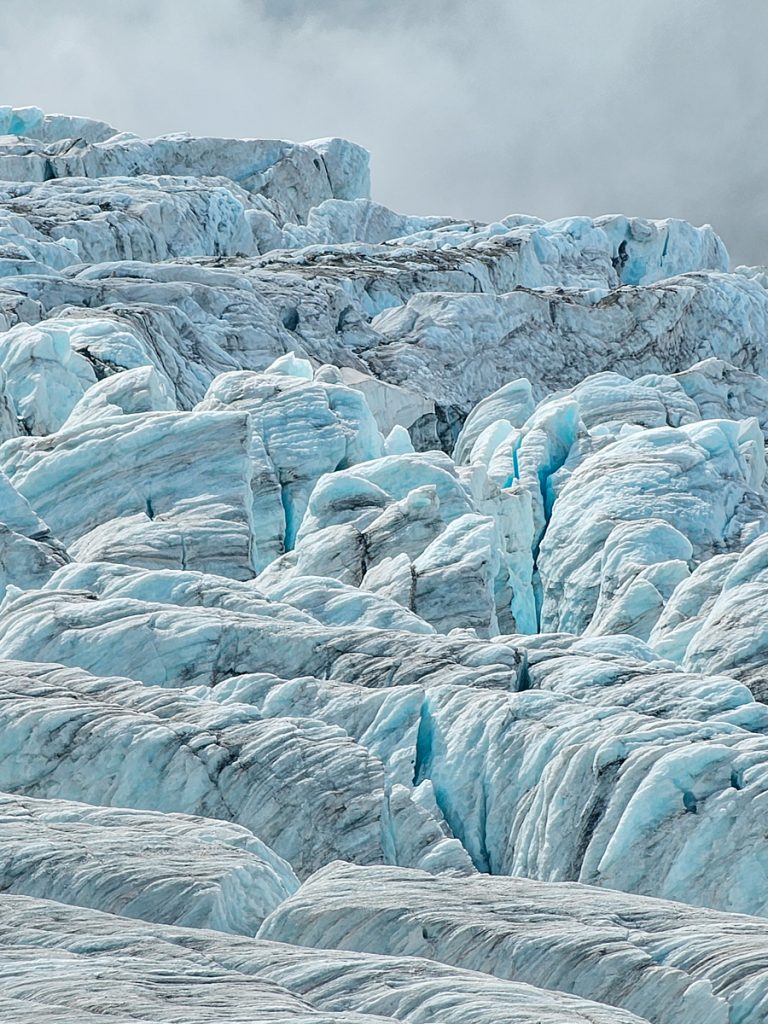
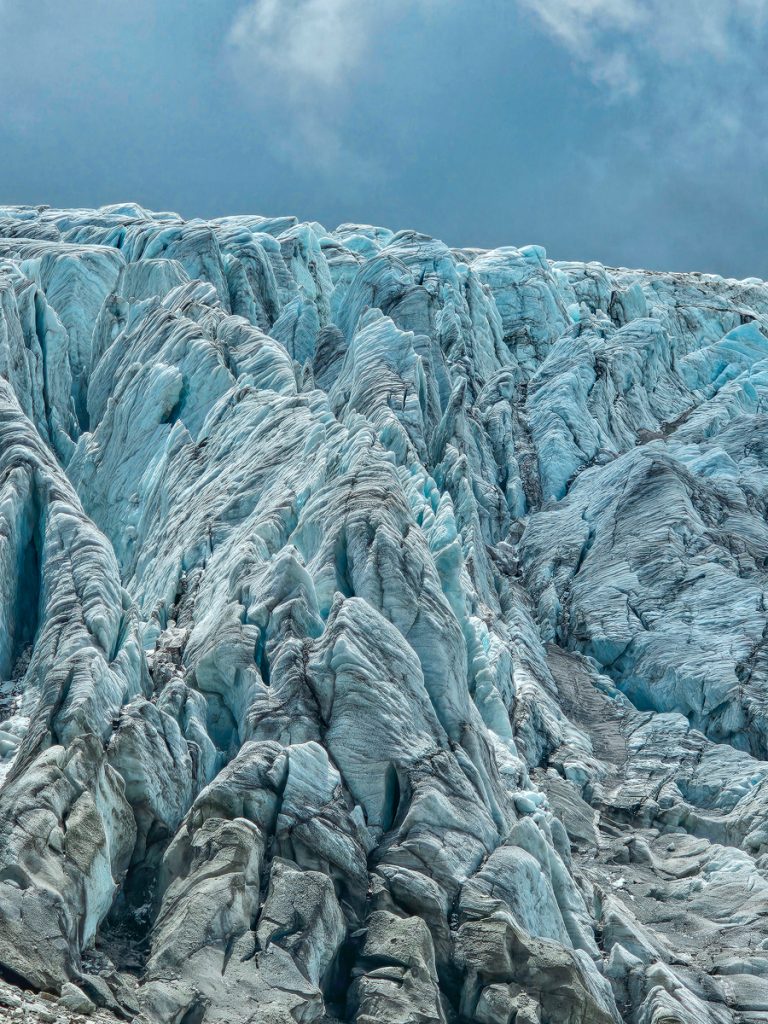
The ice has this vivid blue color that mixes with white snow, gray rock, and black dirt, creating a dramatic, almost otherworldly scene. It feels raw and powerful, especially when you can really take in the scale of it all.
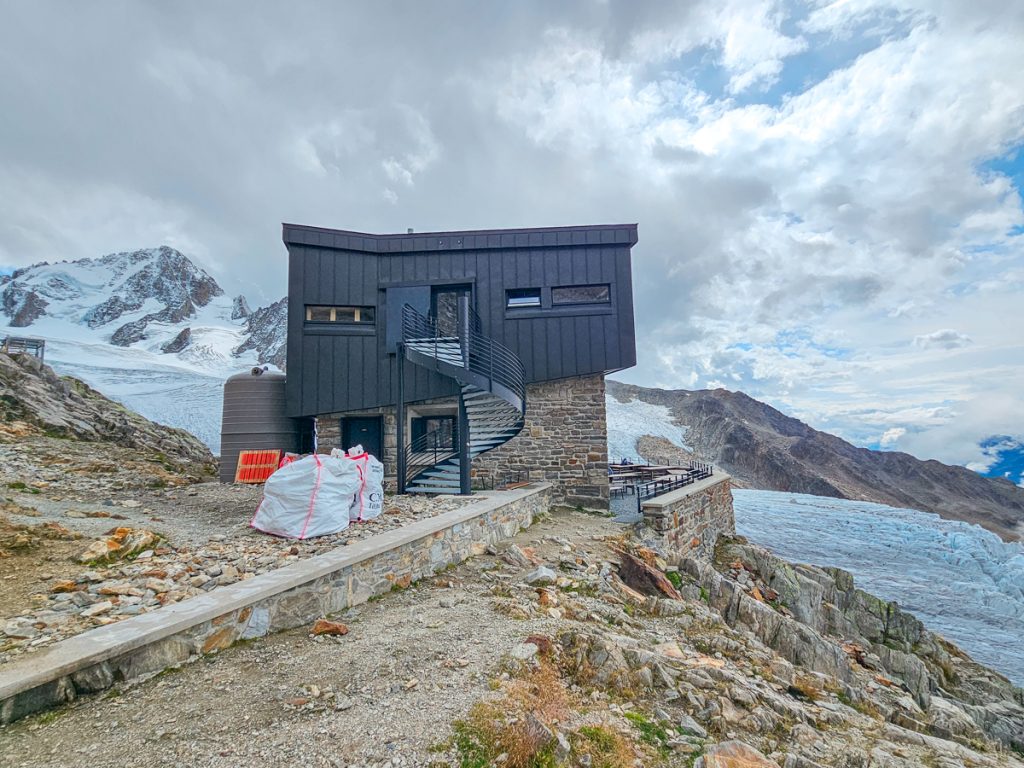
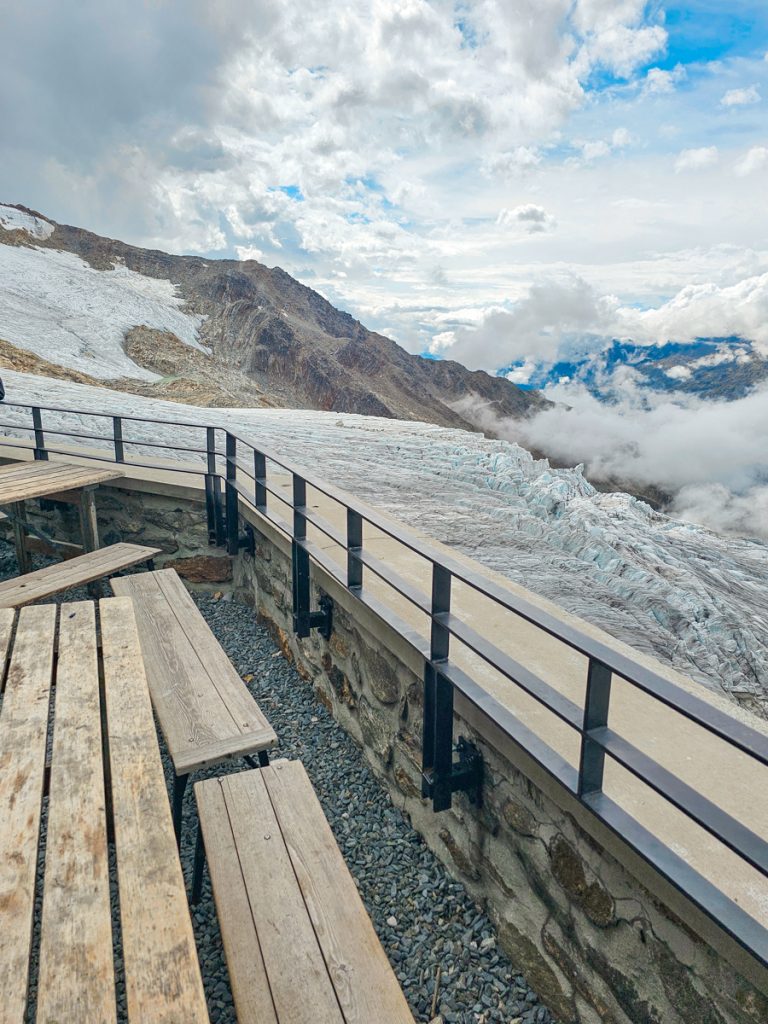
Refuge Albert 1er sits right next to the glacier and feels like a classic alpine hut. Inside, there’s a restaurant and large seating area, making it a great place to recover after the climb. The food is very satisfying, and there are also bathrooms on the lower level.
The refuge is also a staging point for mountaineering. You’ll likely see guided groups preparing to head onto the glacier, along with others getting ready for longer, more technical routes deeper into the mountains. It’s fun to sit, eat, and watch the activity.
Fun fact: all food and supplies for the hut are delivered by helicopter, which gives you an appreciation for how remote this location really is.
After your break, you simply retrace your steps back to the trailhead and take the gondolas down. The hike down is much easier, though the steep section near the hut still requires careful footing.
Trail Stats
- 🚶♀️ Distance: 5 miles (8km) round trip
- 📈 Elevation: 1600 feet (487 meters) of elevation gain
- ⏱️ Time: It took us about 4.5 hours, which included a substantial rest at the hut.
- 🥾 Difficulty: The first part of the hike I would consider easy, the last part I would consider strenuous.
Practical Tips
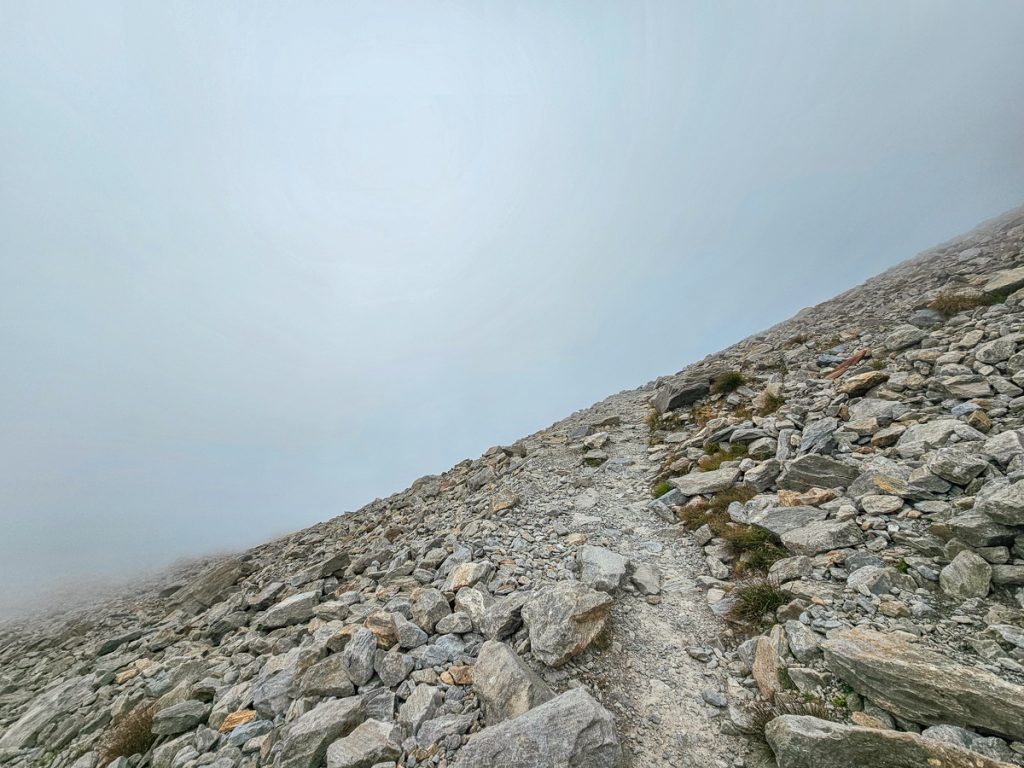
Weather: Weather conditions can change quickly in the mountains, and clear visibility makes a big difference when it comes to enjoying the glacier views. If the weather is poor, you are fully exposed to wind and rain with no shelter along the way.
The views are also much less rewarding if you’re in fog or clouds, so be flexible with your schedule if you can. On our hike, clouds came in while we were at the hut, and we descended in dense fog and light rain (Thankfully, we had had good visibility when we came in!)
Timing: Keep lift hours in mind when planning your starting time. The lifts open at 9 a.m. The last run is typically 4:45 p.m. for the upper lift and 5 p.m. for the lower lift. If you miss the lift, you’re hiking all the way back down the mountain.
Clothing: As always in the Alps, bring layers, even on a sunny day, since temperatures can change quickly at higher elevations.
Final Thoughts
The hike to Refuge Albert 1er is a fantastic way to experience a dramatic glacier environment without committing to a full-on mountaineering adventure.
The route we did, starting at the top of the 2nd lift, struck a great balance between moderate effort and big reward, and the combination of alpine scenery with the striking Albert 1er glacier made this a favorite hike near Chamonix.
If you’re looking for a great half-day hike that feels adventurous and challenging with great views, this one absolutely belongs on your list.
Looking for More Hikes and Experiences in the Alps?
These are some of the other trails and viewpoints we loved in and near Chamonix: